G4G8 was the eighth gathering in celebration of Martin Gardner, held March 26-30, 2008 in Atlanta. Tom Rodgers, the main organizer of the Gathering, asked me to design a permanent outdoor sculpture which can be assembled by a large group of people attending the conference. Above is the final result after several hours of assembly, with some of the participants who stayed until the end. It is called Compass Points and is 52 inches across.
Here we are starting to connect some of the parts to the brackets. There are two shapes of parts and two shapes of brackets, and everything must be assembled with the correct handedness. The 60 long parts and 120 brackets are made of laser-cut of aluminum, held together with 510 stainless steel nuts and bolts. So there is great potential for confusion.
We begin to join the parts to each other with the nuts
and bolts only finger tight. It is a loose tangle.


.
When the first thirty parts are all together, I could tighten all the
nuts.
The form at this point is similar to a small stellated dodecahedron,
but the parts weave around each other in a chiral manner.

The tips of these parts meet in groups
of five.
Adding new pieces is tricky, as they
have to weave properly in and out of the other pieces.
Several times we had an over/under relationship reversed and had to disassemble slightly.
Several times we had an over/under relationship reversed and had to disassemble slightly.
The form at this point is similar to a small stellated dodecahedron,
but the parts weave around each other in a chiral manner.
Next we start connecting the second
shape of parts to the second type of bracket.
Note the hole at the center of each part, where they cross and are bolted together.
Note the hole at the center of each part, where they cross and are bolted together.
Again handedness is an
issue as we join these thirty parts to the first thirty and to each
other.
Parts of this second type meet in
groups of three at right angles, like a corner of a cube.
This bracket was accidentally placed on the exterior, so we disassembled it to correct it.
This bracket was accidentally placed on the exterior, so we disassembled it to correct it.
When everything looks good, I can
tighten
all the nuts.
It took a while because the battery didn't hold much charge.
It took a while because the battery didn't hold much charge.
Here is the inside, partially done.
You can see several central crossing points.

When the major parts are all in place
we can add the four feet.
Here is a closeup of one foot. The
hole is designed to bolt to a cement base.
In a triumphal procession, we carry it over to the permanent site.
The feet exactly fit onto the bolts cast into the plinth.
Finally, I get to rest. One tired, happy sculptor!
Thank you to everyone who participated
in the assembly!
An extra special thanks to Tom Rodgers for making this possible.
Thank you Bill Grove for pouring the base so quickly and accurately.
Thank you Lester Orlick for helping me make the brackets and feet.
Thank you to Irina, Alex, Tuncay, and Giordano at Stony Brook,
who helped me test the fit and the assembly steps a week earlier.
And thank you Peter Knoppers and Charlotte Henderson,
for providing many of the above images.
Addendum

Sébastien
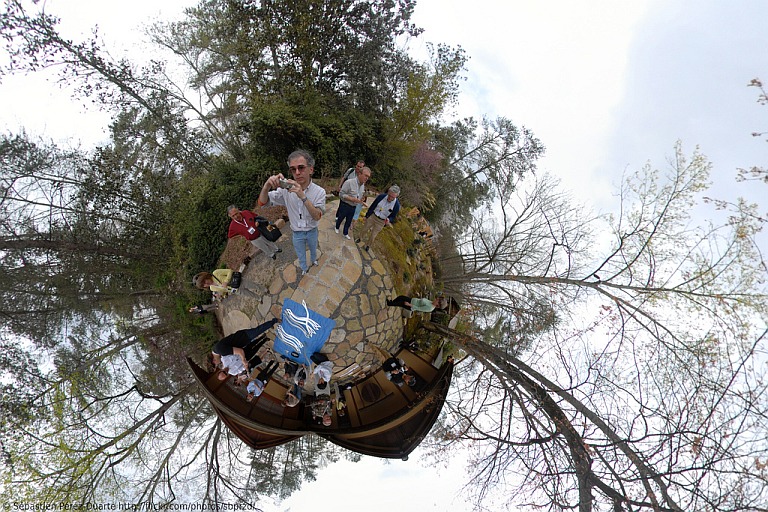
Perez-Duarte made this cool stereographic all-around image of the
start of the construction.
For an interactive version, click here (Shockwave) or here (Flash).

Sébastien Perez-Duarte also made this panoramic all-around view from inside at mid-construction.
Thirty pieces are assembled and thirty more are on the ground, waiting to be added.

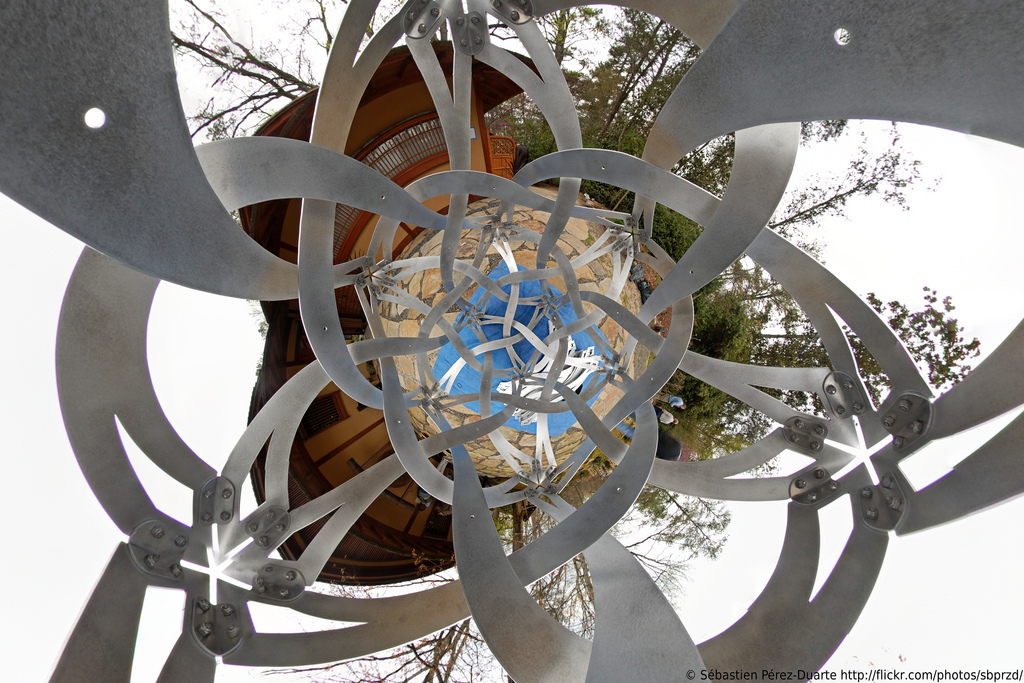
Sébastien made this view also, based on the same data but centered on the nadir.
I love the dizzying sense of motion. Notice that you can see all twelve 5-fold joints.

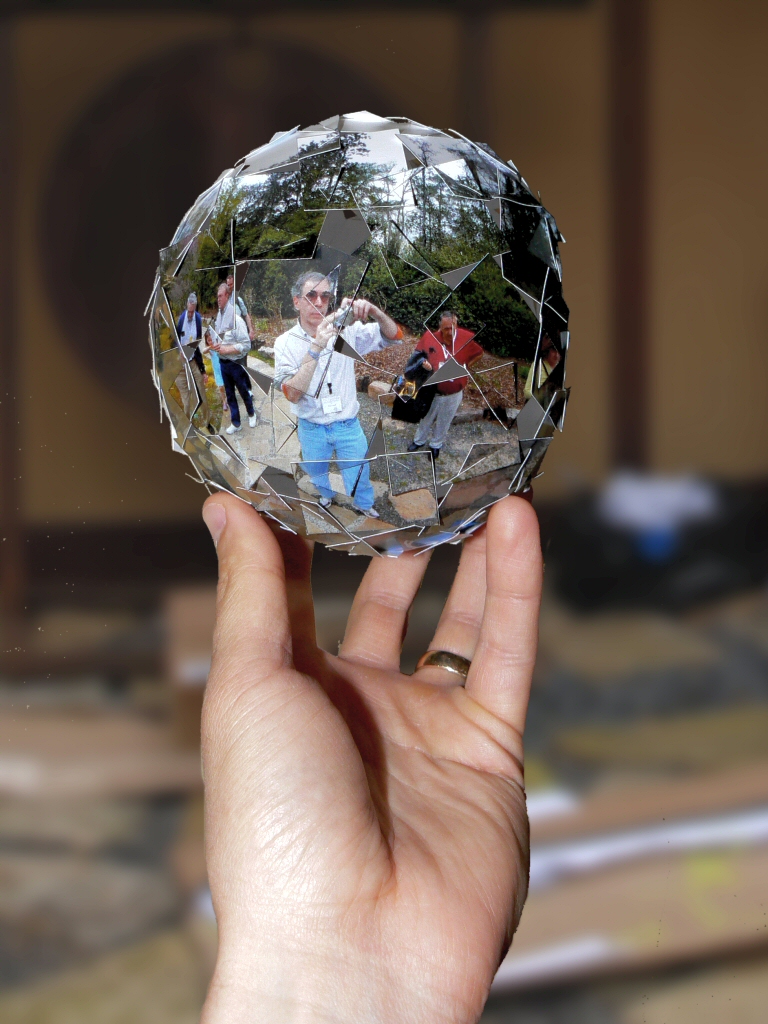
David Swart took Sébastien's image and mapped it to rectangles that assemble as a paper ball.
David provides the image for you to cut and assemble your own ball. I found it fun to do.
Weirdly, it makes me feel I am looking into Escher's mirrored self-portrait sphere, but it's me.
For an interactive version, click here (Shockwave) or here (Flash).

Sébastien Perez-Duarte also made this panoramic all-around view from inside at mid-construction.
Thirty pieces are assembled and thirty more are on the ground, waiting to be added.

Sébastien made this view also, based on the same data but centered on the nadir.
I love the dizzying sense of motion. Notice that you can see all twelve 5-fold joints.

David Swart took Sébastien's image and mapped it to rectangles that assemble as a paper ball.
David provides the image for you to cut and assemble your own ball. I found it fun to do.
Weirdly, it makes me feel I am looking into Escher's mirrored self-portrait sphere, but it's me.